Cloud Installation
This section provides step-by-step guides for deploying Meltano on various cloud environments. Currently, we provide detailed intructions for:
We are working toward one-click installers, and will update this page as soon as those become available. In the meantime, Meltano can be deployed locally or to the cloud using these instructions.
DigitalOcean Marketplace
DigitalOcean provides a simple container for spinning up a server where Meltano can be deployed to the Cloud.
Instructions
Select
Create Meltano DropletIf you are not logged in already, you will be asked to login, or create a new DigitalOcean account
By default, your droplet will come with the following settings that you can customize if desired
- Image: Meltano
- Plan: Starter - Standard
- $40/mo (8GB / 4 CPUs, 160 GB / SSD disk, 5 TB transfer)
- Datacenter: A default datacenter region (depending your location)
- Number of Droplets: 1 Droplet
- Backups: Not enabled by default
Add authentication to your droplet via SSH
Click
Create Droplet
Once your Droplet is created, it will have its own IP address displayed in the DigitalOcean user interface.
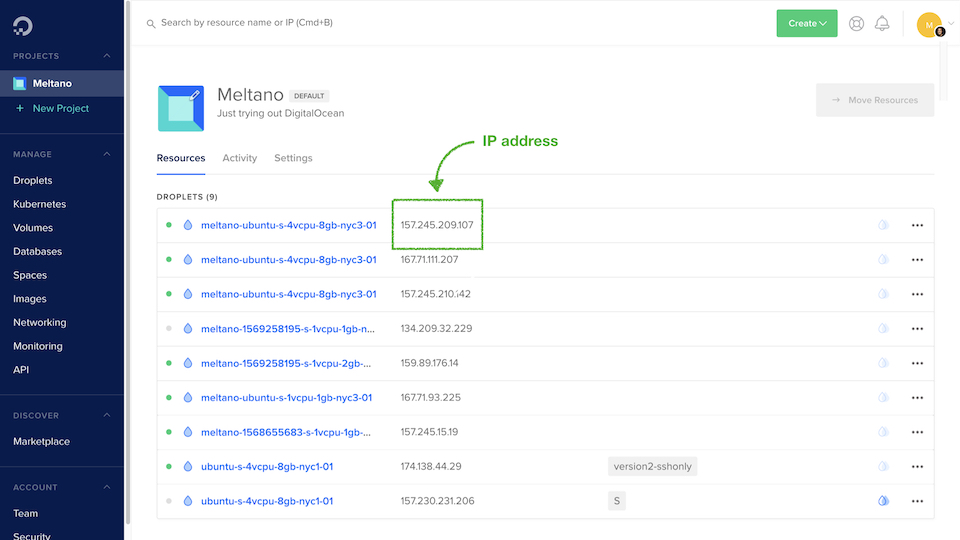
- Visit your Meltano instance at port 5000, like so:
http://{YOUR_IP_ADDRESS}:5000
Now that you've got your Meltano instance up and running, visit our Getting Started Guide to connect some data sources and start building your data pipelines and dashboards!
Looking to customize your DigitalOcean Droplet build and configuration? Please follow the instructions in our Advanced Tutorial: Manually Creating a DigitalOcean Droplet.
Amazon Web Services (AWS)
Prerequisites
This guide assumes that you have a functioning Docker image where your Meltano project is already bundled with the Meltano installation. To track this issue, follow meltano#624.
In this section, we will be going over how you can deploy a Meltano Docker image to AWS.
Setting Up Elastic Container Service (ECS)
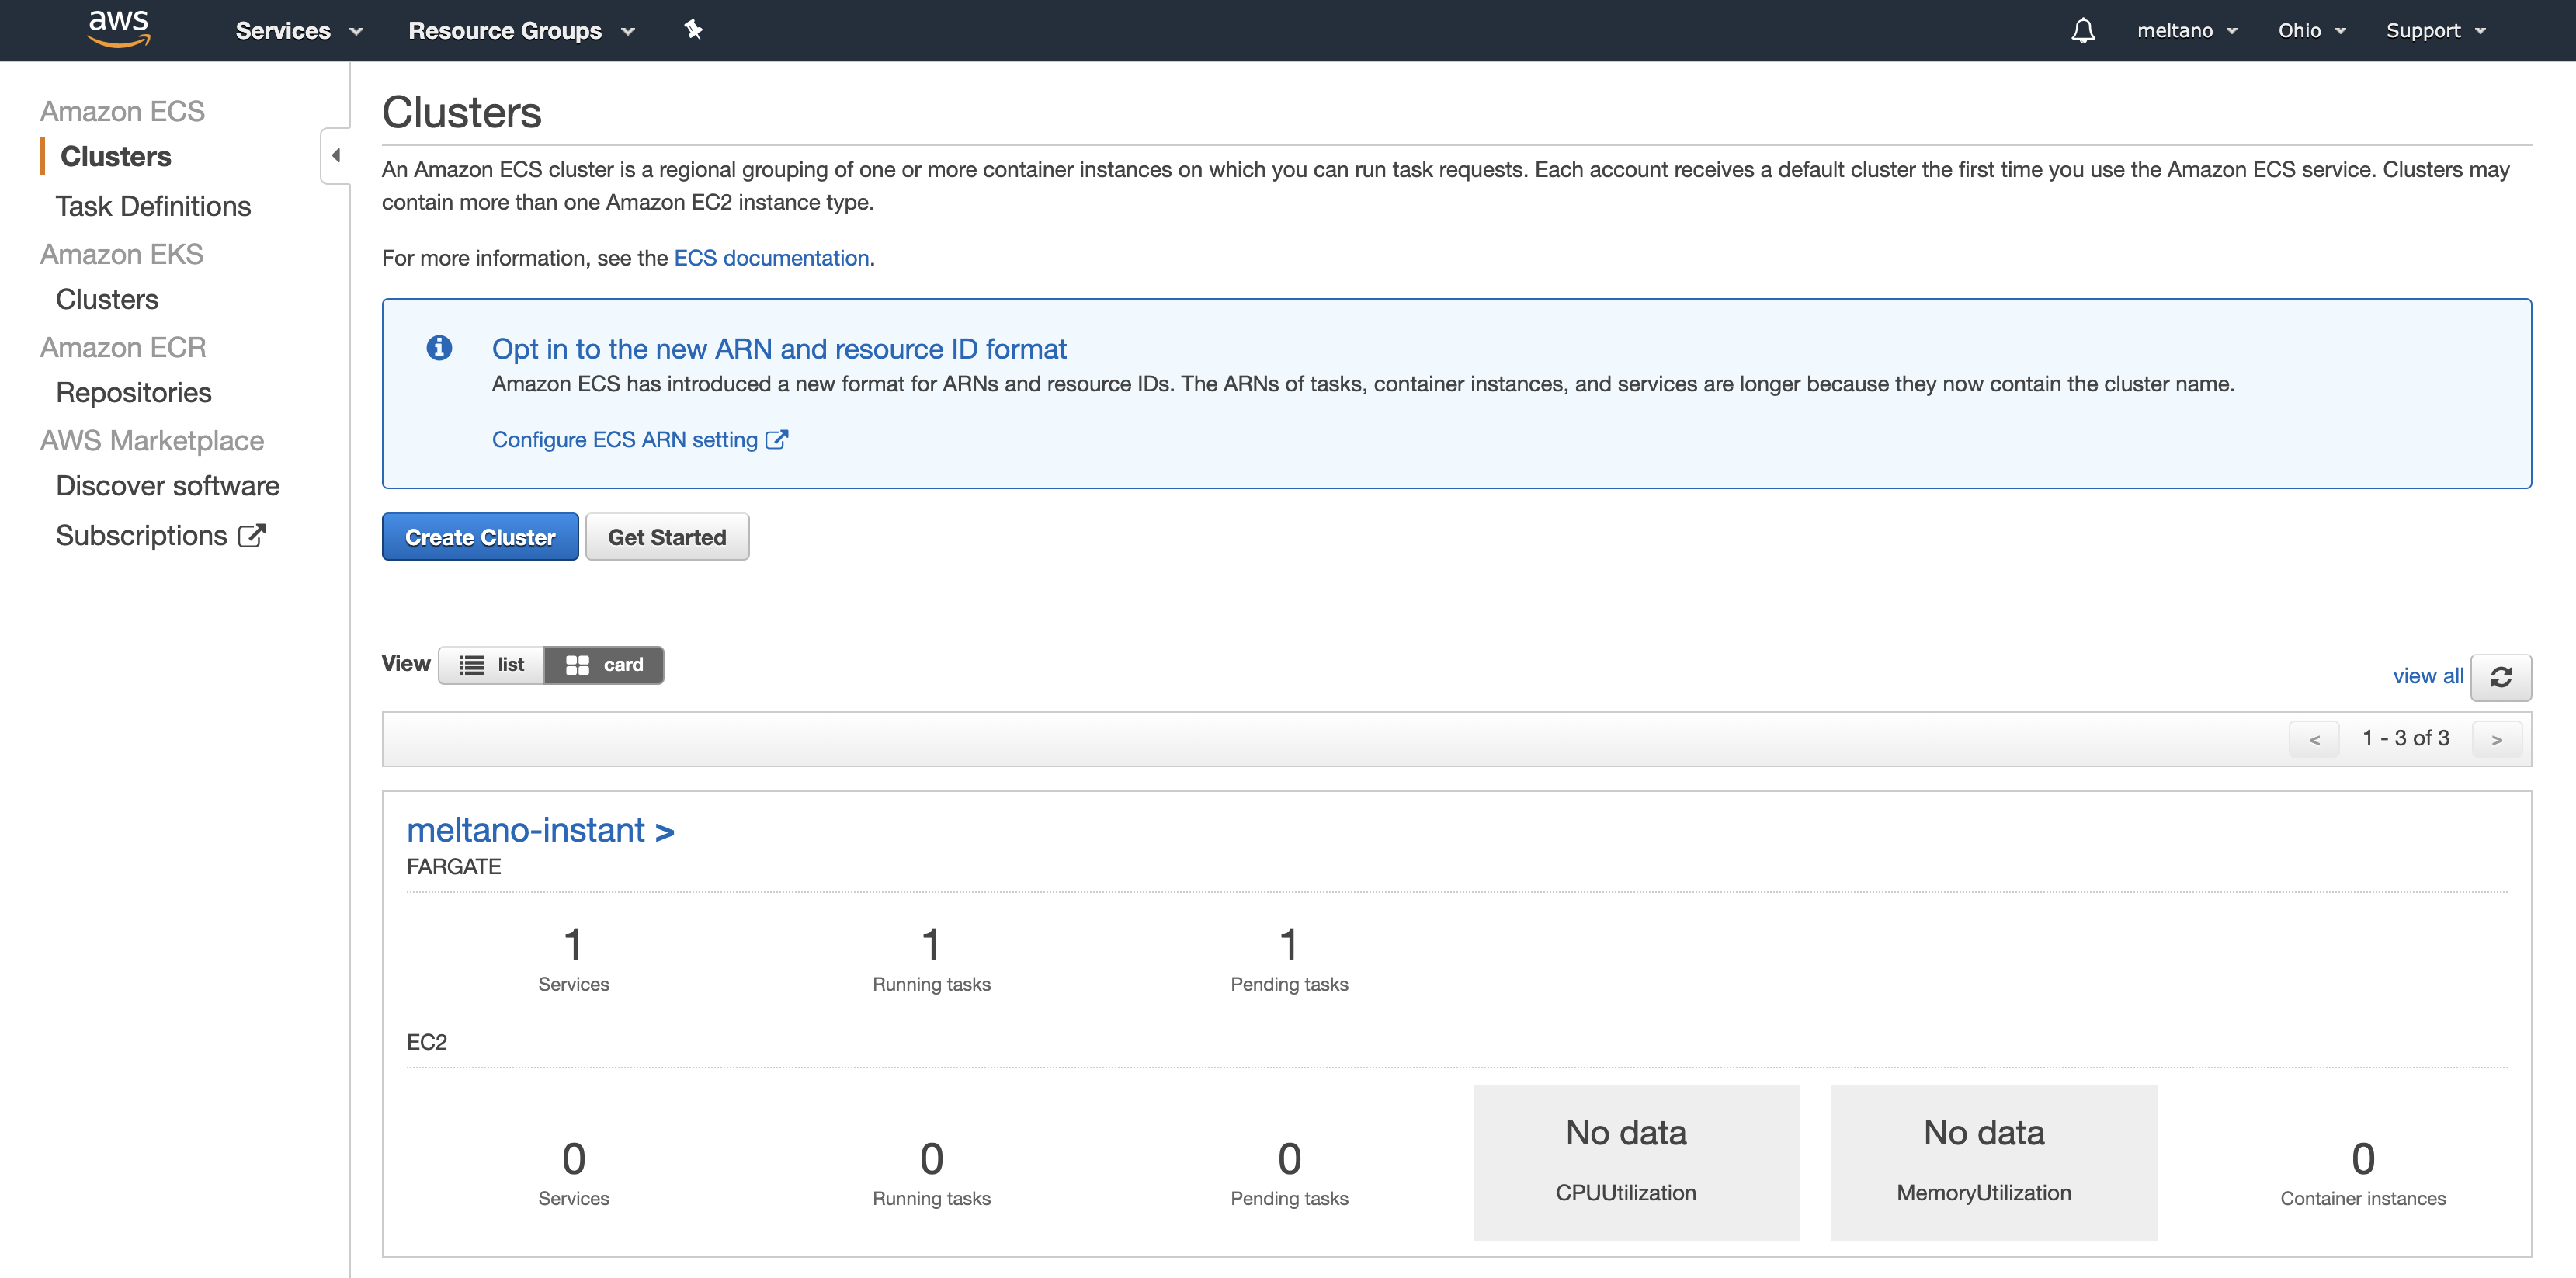
- Login to AWS Console
- Search for ECS and click on the link
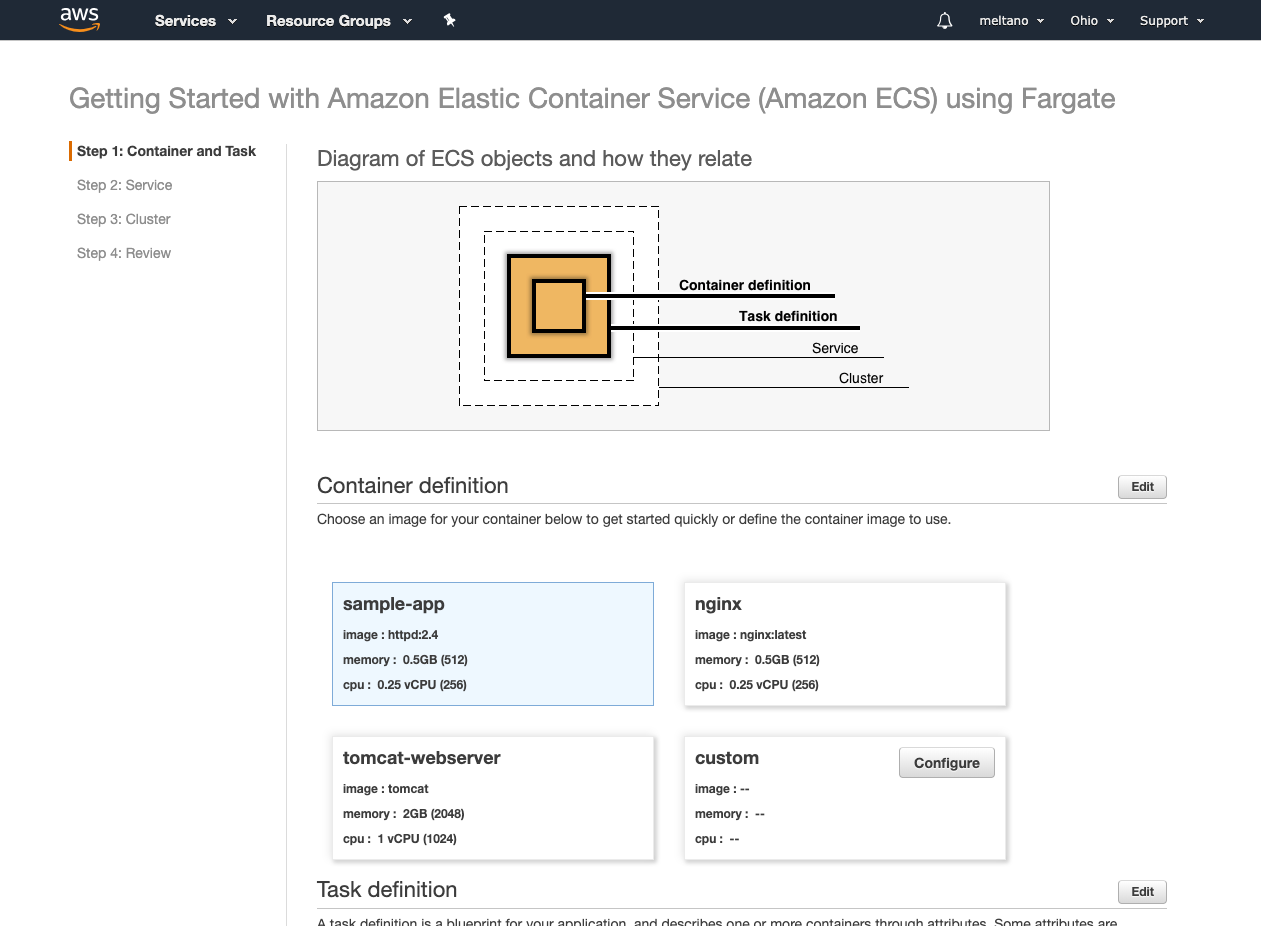
- We will create a new Container definition by clicking on the
Configurebutton in the custom card - Fill out the form with the following data:
- Container name: Meltano
- Image: YOUR_DOCKER_IMAGE_URL
- Examples:
- docker.io/namespace/image-name:tag
- registry.gitlab.com/namespace/project/image-name:tag
- Examples:
- Memory Limits (MiB): Soft limit 1024
- Port mappings:
- 5000/tcp (meltano)
- 5010/tcp (airflow)
- Click
Updatebutton to finish setting up your container defintion - Click
Editnext to the Task defintion heading - Update the form with the following:
- Task definition name: meltano-run
- Network mode: awsvpc
- Task execution role: ecsTaskExecutionRole
- Compatibilities: FARGATE
- Task memory: 1GB (1024)
- Task CPU: 0.25 vCPU (256)
- Click
Nextto move to the next step
Review service properties
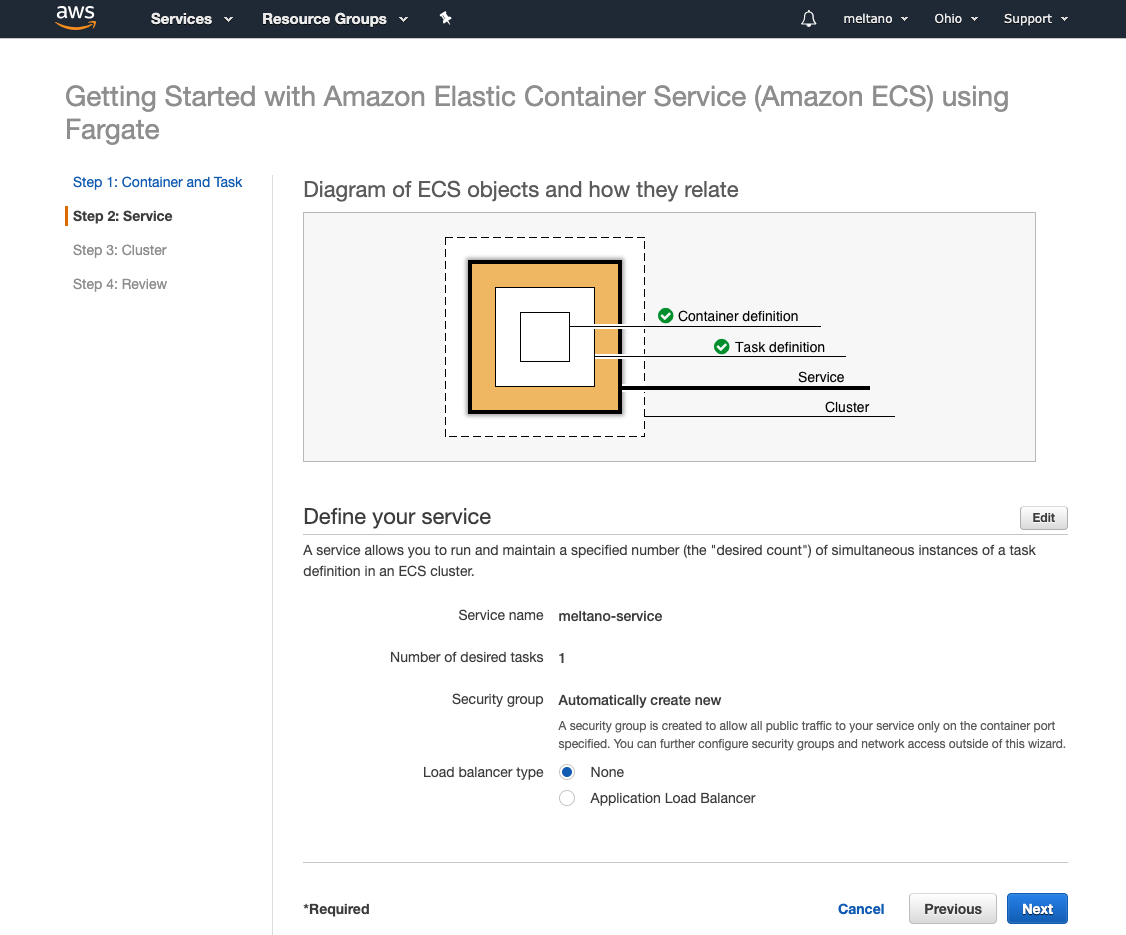
- Verify that the properties are as follows:
- Service name: meltano-service
- Number of desired tasks: 1
- Security group: Automatically create new
- Load balancer type: None
- Click
Nextto move on to the next step
Configure Your Cluster
The main configuration here is the Cluster name. We provide a suggestion below, but feel free to name it as you wish.
- Cluster name: meltano-cluster
- VPC ID: Automatically create new
- Subnets: Automatically create new
Review Cluster Configuration
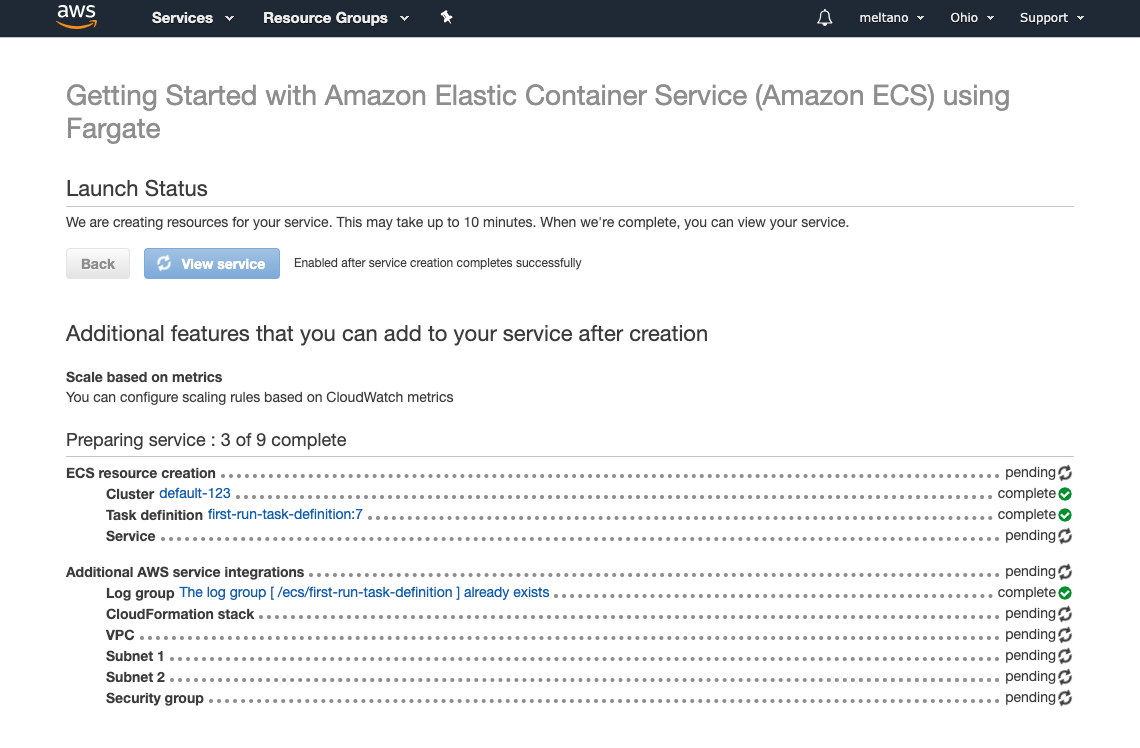
After you click Next, you will have the opportunity to review all of the properties that you set. Once you confirm that the settings are correct, click Create to setup your ECS.
You should now see a page where Amazon prepares the services we configured. There will be spinning icons on the right of each service that will live update as it finished. Once you see everything has setup properly, you're cluster has been successfully deployed!
Final steps
- Open the page with your cluster
- Click on the Tasks tab
- You should see a task that has a status of
RUNNINGfor Last Status - Click on the Task ID link (e.g., 0b35dea-3ca..)
- Under Network, you can find the URL for your instance under Public IP (e.g., 18.18.134.18)
- Open a new tab in your browser and visit this new URL on port 5000 (e.g., http://18.18.134.18:5000)
TIP
The IP address can be mapped to a domain using Route53. We will be writing up a guide on how to do this. You can follow along at meltano#625.
Configure network access
TIP
This section is only necessary if you do not have a Security Group that allows for port 5000,5010 inbound.
Once you complete the cluster setup, you should be brought to the detail page for the service. You should be default on a tab called Details with a Network Access section.
- Navigate to the Details tab
- Under Network Access, click on the link next to Security Groups (e.g., sg-f0dj093dkjf10)
- This should open a new tab with your security group
- Navigate to the Inbound Rules tab on the bottom of the page
- Click
Edit Rules - Delete any existing rules
- Click
Add Rulewith the following properties:
- Type: Custom TCP Rule
- Protocol: TCP
- Port Range: 5000
- Source: Custom 0.0.0.0/0
- Click "Add Rule" with the following properties:
- Type: Custom TCP Rule
- Protocol: TCP
- Port Range: 5010
- Source: Custom 0.0.0.0/0
- Click
Save rules